Bike Build 2013 - The Automatic Bike
I though it was about time that I built another bicycle. I've always wanted an automatic bike, one that would keep a constant cadence,
So when I saw that there was a new
NuVinci
hub gear that was lighter and cheaper and offered e-shift, I couldn't resist starting a new project.
If you want to see how this CVT hub works here's
the video.
First you need a frame. The N360 isn't light at 2.4kg. So I needed to save a much weight in this build as possible. So it had to be carbon.
Before you can order a frame you need to know your size.
There are quite a few good websites with frame sizing software based on you body/limb proportions.
Check out
Competitive Cyclist
or
ebicycles frame sizer
and of course measure your existing bike.
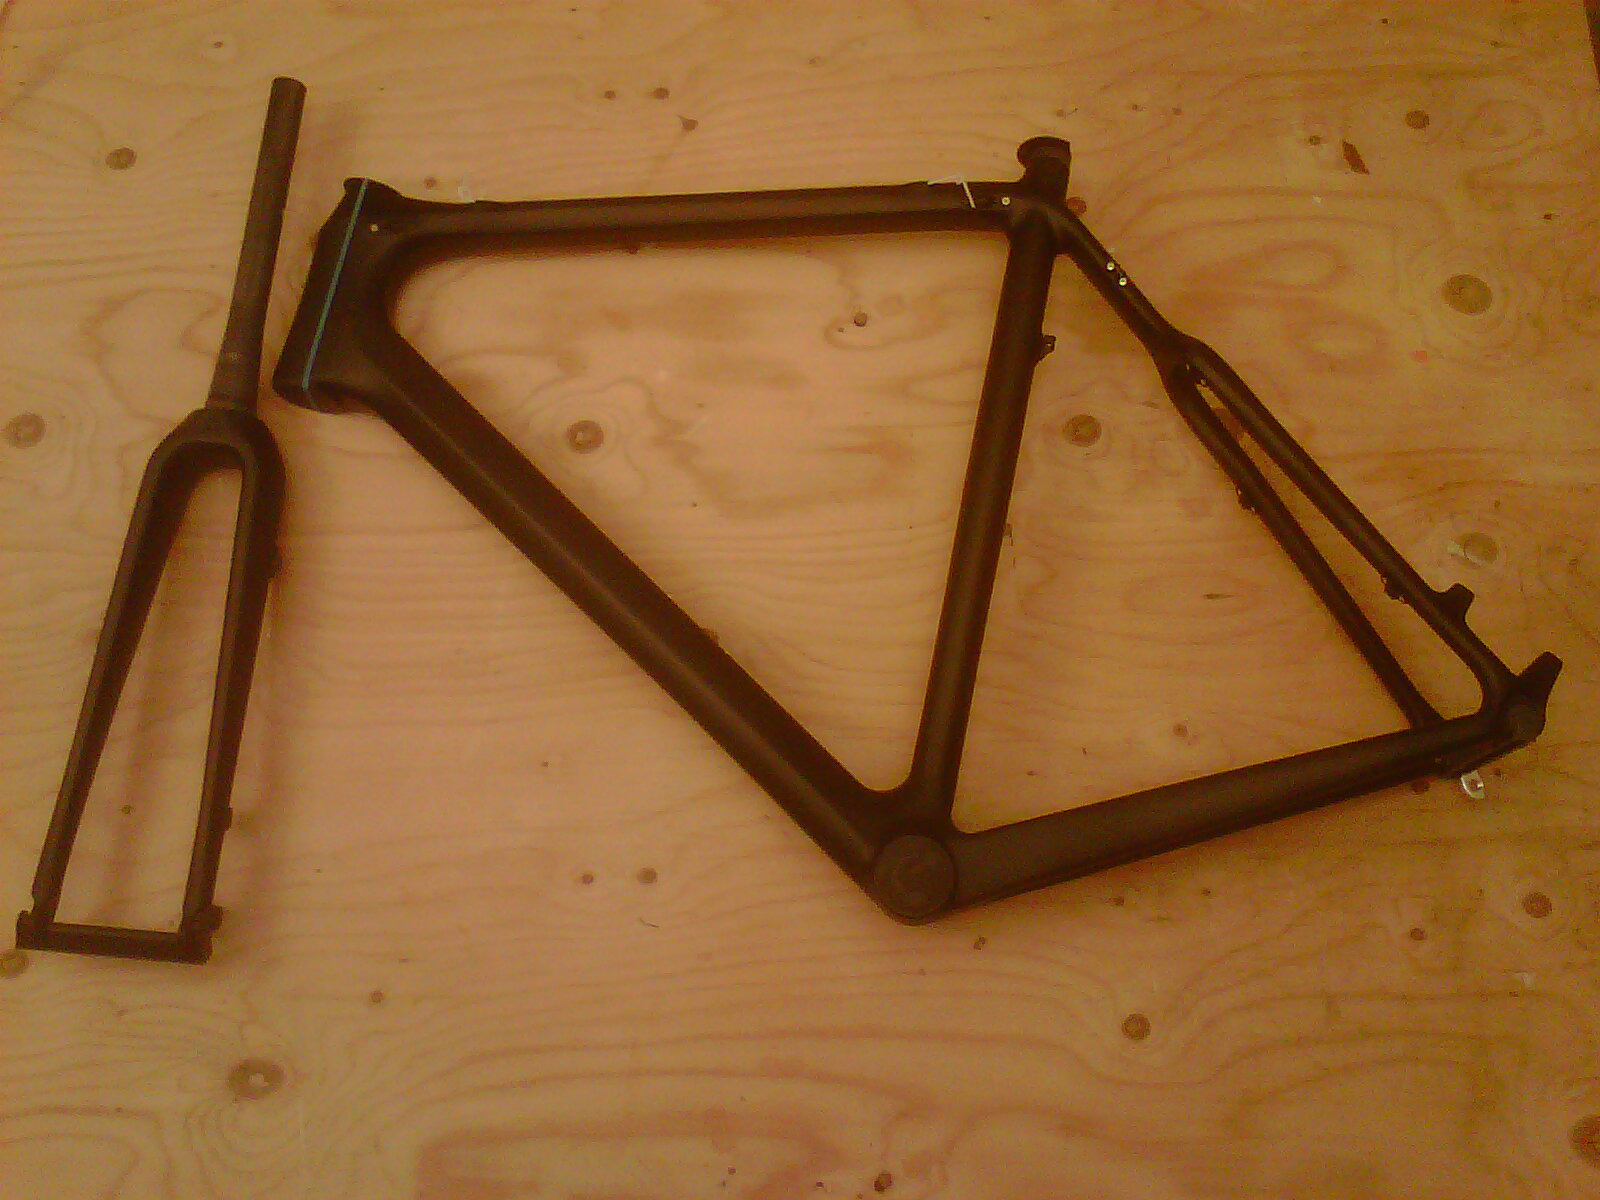 The other complication is that this hub gear requires a 135mm dropout width, the same as I needed for the Alfine-11.
So I had to purchase a Cyclocross frame. This one, an FM089, came from
Hongfu bikes in China. It took less than a week to arrive in the Uk, fantastic service.
The other complication is that this hub gear requires a 135mm dropout width, the same as I needed for the Alfine-11.
So I had to purchase a Cyclocross frame. This one, an FM089, came from
Hongfu bikes in China. It took less than a week to arrive in the Uk, fantastic service.
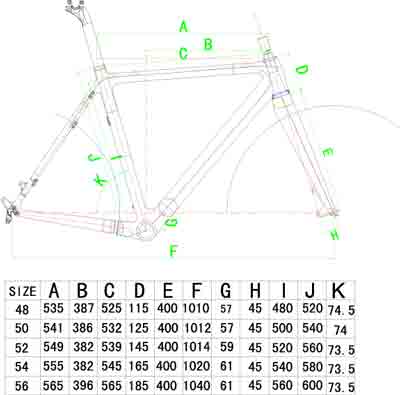 This is the frame sizes on offer for the FM089 CycloX frame. I chose the 56.
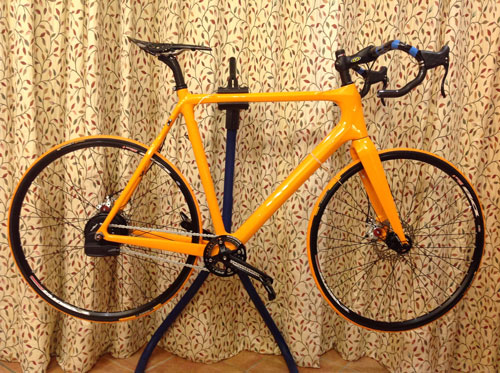
 The first step was to have the frame primed and painted. Believe me, it's a lovely shade of Orange...
Many thanks Martin.
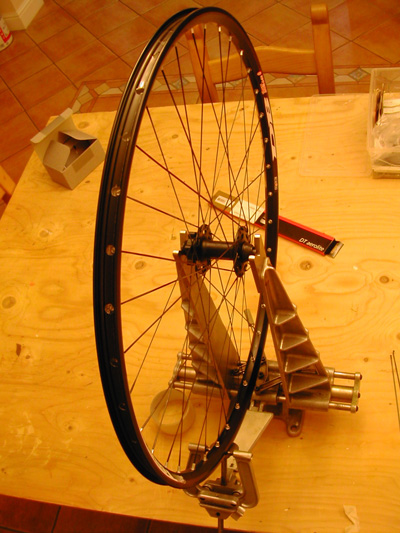
 Meanwhile I started to sub assemble the rest of the components starting with the front wheel.
The rim I've used is a Rigida Taurus 700c (622) Touring Disc Rim in black from
SJS Cycles
and the spokes are DT Aero Lite from
Dot Bikes. I always regretted not using aero spokes on the last project as every little bit helps.
But they aren't cheap...
This front wheel is laced 3x.
Here are a couple of useful sites on wheel building.
Wheelbuilding by Steve Litt and
Wheelbuilding by Sheldon Brown both are excellent.
It isn't difficult as long as you don't have any distractions. This wheel took me 2 hours to lace and true.
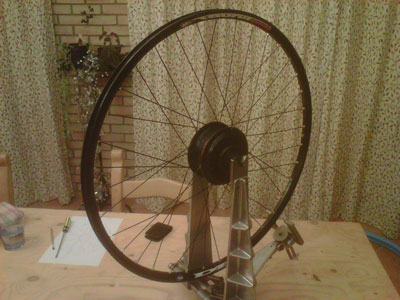
 Then out with the trusty wheel truing jig, many thanks Andy for the loan of said tool.
 The Nuvinci hub I ordered from Ross at
Joule (Juice) Bikes
back in mid January and I was very excited when he called to say
the unit
had arrived a week early, 5 instead of 6 weeks from placement of order.
When the unit arrived I checked it dimensionally and ordered the Aerolite spokes. This time I ordered them from
Planet X bikes as they were selling them at
2/3 the price
I paid at
Dot Bikes, an offer too good to miss. Although I did have to source my own nipples.
The Nuvinci hub I ordered from Ross at
Joule (Juice) Bikes
back in mid January and I was very excited when he called to say
the unit
had arrived a week early, 5 instead of 6 weeks from placement of order.
When the unit arrived I checked it dimensionally and ordered the Aerolite spokes. This time I ordered them from
Planet X bikes as they were selling them at
2/3 the price
I paid at
Dot Bikes, an offer too good to miss. Although I did have to source my own nipples.
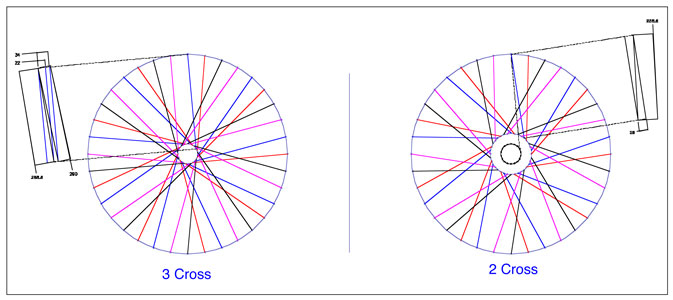 The front wheel is spoked 3-cross whereas the rear is spoked 2-cross. the reason for this is the fact that the front hub spokes are on a 61mm pcd
whereas the rear hub is a 125mm pcd. Even as a 2-cross the moment arm of the spoke is greater than that achieved on the front.
The front wheel is spoked 3-cross whereas the rear is spoked 2-cross. the reason for this is the fact that the front hub spokes are on a 61mm pcd
whereas the rear hub is a 125mm pcd. Even as a 2-cross the moment arm of the spoke is greater than that achieved on the front.
 Here it is all assembled on a Park Tool stand I bought off a colleague leaving to return to his native Canada. they certainly make this job a lot easier.
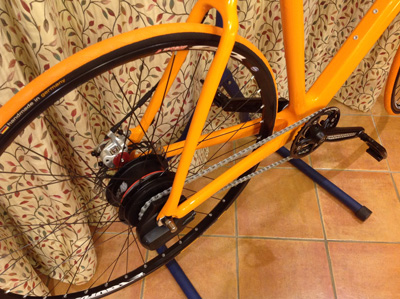 Here's a close up of the drive-train.
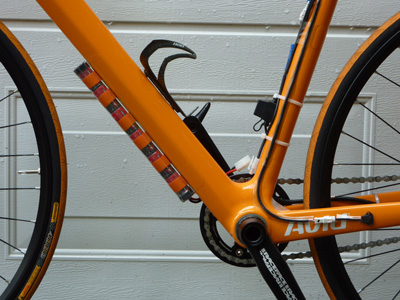
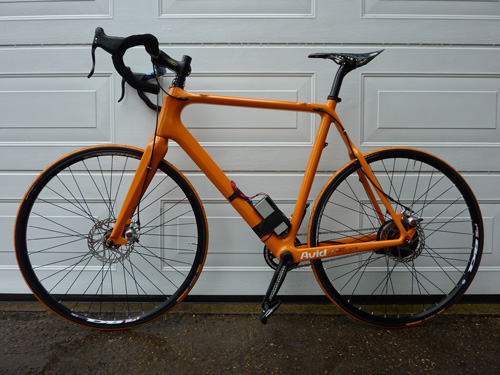 Here it is ready for the first ride. Excuse the lead acid taped to the frame. I bought this for a cheap and quick test of the system before I
invest in the lighter but a lot more expensive Lithium battery technology. While I'm learning about the system and it's power demands with my homemade
data logger
then a lead acid gel battery is a good option.
Here it is ready for the first ride. Excuse the lead acid taped to the frame. I bought this for a cheap and quick test of the system before I
invest in the lighter but a lot more expensive Lithium battery technology. While I'm learning about the system and it's power demands with my homemade
data logger
then a lead acid gel battery is a good option.
The good news is everything worked as it should. While I waited for the handlebar extender to mount the advanced Nuvinci controller I used the basic 3 cadence selector. This
works really well. Riding a constant cadence bike is a little strange at first, the harder you pedal the faster the bike goes but not your legs. I found the 3 preset cadences
good for climbing, the flat and descending.
Now all I need is some warmer weather and I'll feel more inclined to get out and put some miles on it.
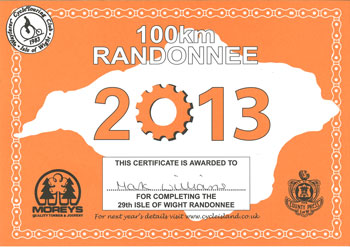 With the IoW Randonnee completed I could now take some time to tune the bike.
 As delivered the steerer tube was too long, so until I had a feel for the correct length for me, I simply used a large
number of spacers above the stem. Low bars are good for your aerodynamics but it does rather take it's toll on the nether
regions as you discover that your back isn't quite as flexible at it was in your youth.... So having found my limit it was time to cut off the surplus steerer tube.
As delivered the steerer tube was too long, so until I had a feel for the correct length for me, I simply used a large
number of spacers above the stem. Low bars are good for your aerodynamics but it does rather take it's toll on the nether
regions as you discover that your back isn't quite as flexible at it was in your youth.... So having found my limit it was time to cut off the surplus steerer tube.
Here's a good article by
Park Tool
on how to do it the professional way
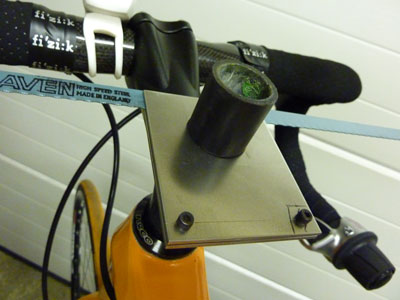
Not wishing to make the investment in such a fixture for a one off cut I chose to improvise with the help of a friendly Fabby who
punch out these two plates for me. Appropriately spaced apart by washers I started the cut.
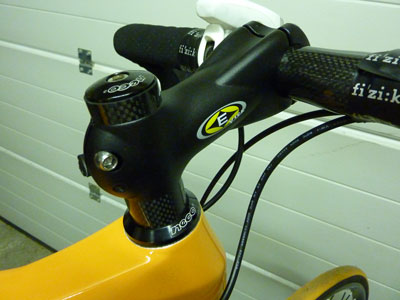 Everything turned out fine (and square) and here it is assembled with the top cap.
And I have the option to raise them up to 10mm should I need to.
 Here's the bike fitted with a NiMH battery pack and the second version of the
data logger and display.
Here's the bike fitted with a NiMH battery pack and the second version of the
data logger and display.
 The NiMH battery is a
12 cell Vapex Technology NiMH with 3300mAh capacity
and saves approximately 600g over the 12v Lead acid battery I started the project with.
The NiMH battery is a
12 cell Vapex Technology NiMH with 3300mAh capacity
and saves approximately 600g over the 12v Lead acid battery I started the project with.
The charger I'm using for it is an
Ansmann Racing xBase 2.0 Delux from
Modelsport UK.
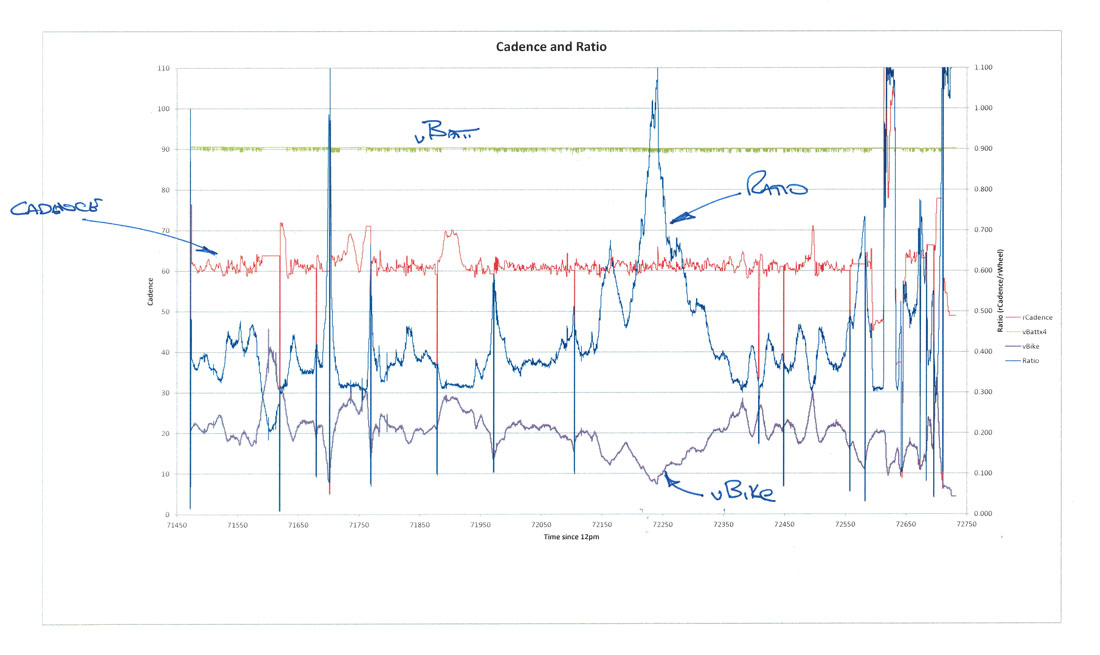
Here's some typical data taken from the
logger
showing a cadence target ≈ 62rpm (red) with speed (purple) and ratio (blue) which in this case is simply cadence divided by wheel speed.
The green trace is battery voltage and noise on this signal indicates shift activity in the Nuvinci hub. When the Nuvinci runs out of authority,
because it is in the highest or lowest gear ratio, the cadence changes from the demanded value and there is no shift activity influence seen on the battery voltage.
This can be seen in a few cases on this trace when going downhill as I have geared the bike for climbing and input low torque.
Where the cadence trace appears to drop out it is because I have stopped pedaling and the time period between interrupts is large.