July 2005
With the Transom pattern complete it's time to start laminating.
The transom will eventually be 4 off ¼" laminates. The last one will be
fitted after the bottom panels have been double skinned,
so the initial laminate will only be 3 plies.
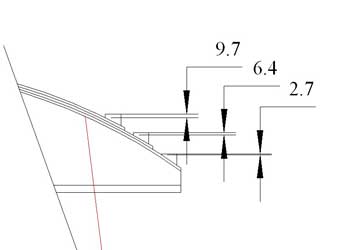
The sketch below shows the blocks, which are bonded to the laminates, which
when screwed down will fix and tension the laminates to the transom pattern.
I used TiteBond III to bond the blocks on.
It's the first time I tried this glue and in all the hype they never mention
the applicator which I think is really neat.
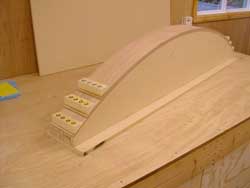 Here's a dry run of the assembly procedure.
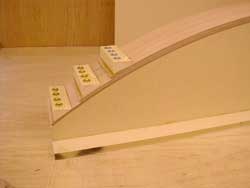 And a close up of the end detail.
I would have included a picture of the finished laminate
but it doesn't look any different.
![]() Although the edges of each piece were planed flat and square, when laminated they
were not flush with the edge of the pattern. As they were either the correct height
or proud it was a simple matter to scrape them flush with the side of the pattern
using a cabinet scraper. The best thing about using a scraper rather then sanding
is there's less dust produced. If the scraper is kept sharp there's almost none,
just fine shavings.
Although the edges of each piece were planed flat and square, when laminated they
were not flush with the edge of the pattern. As they were either the correct height
or proud it was a simple matter to scrape them flush with the side of the pattern
using a cabinet scraper. The best thing about using a scraper rather then sanding
is there's less dust produced. If the scraper is kept sharp there's almost none,
just fine shavings.