Dawes Bike Rebuild
 A weeks vacation in Spain was a very welcome break and time to start training
for the IoW mini Randonnee. It's so much
easier training in a warmer climate. 3 weeks isn't really long enough preparation
for a 55km cycle ride when I haven't ridden for over 12 months and nothing this serious
ever! Especially when the lowest ratio is 44/24. More about that later...
A weeks vacation in Spain was a very welcome break and time to start training
for the IoW mini Randonnee. It's so much
easier training in a warmer climate. 3 weeks isn't really long enough preparation
for a 55km cycle ride when I haven't ridden for over 12 months and nothing this serious
ever! Especially when the lowest ratio is 44/24. More about that later...
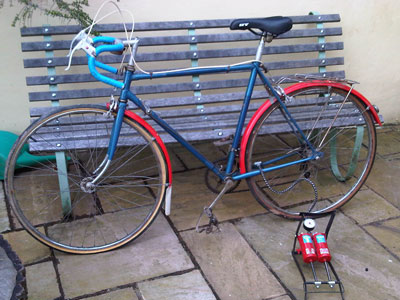
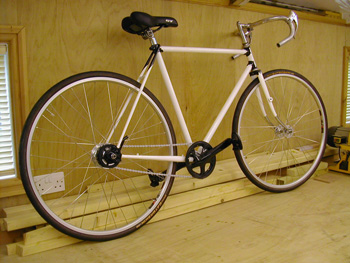
The bike had to be prepared too. I've owned it for 40 years and it was second
hand when I acquired it. I can't even remember the last time I serviced it.
Well, it was in a bit of a state, requiring; new pedals, an opportunity to upgrade
to cleats, a new front tyre and a full bearings service. Don't ask about the awful paint job.
When new it was a lovely metallic gold but too many scratches and being a steel frame, rust, meant it needed painting.
We had a lot of blue paint on the shelf...
The event was a success and I made it round in 5 hours with 3 1/2 hours pedaling time.
Climbing 1542ft and averaging 9.8mph or so GPSLogger
tells me. I fancy attempting the 100km route next year but that will require some serious preparation, both
for me and the bike.
 So as a reward for finishing the event and in preparation for the 2012 event I stripped it of it's old
paint ans gave it a more modern looking, higher visibility, colour scheme.
So as a reward for finishing the event and in preparation for the 2012 event I stripped it of it's old
paint ans gave it a more modern looking, higher visibility, colour scheme.
Painting it on a spit was my Dad's idea and it worked a treat.
The detail on the fittings is quite incredible, so I had to pick that out in black.
The next step was a new bottom bracket as the old cotter pin design had worn out.
The plan is to switch to a whole new gearset. The key learning from my first IoW Randonnee was
that I didn't have enough low gears.
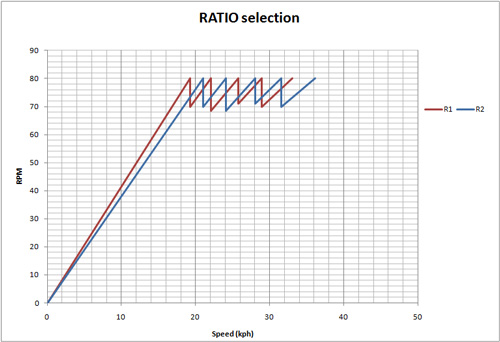 Here's the ratio situation I spoke of earlier. It has a 44/48 chainset with a 24/21/18/16/14 cogset which gives this ratio chart.
Very limiting below 20kph...
 Compare this to my off road bike and you'll see what I mean.
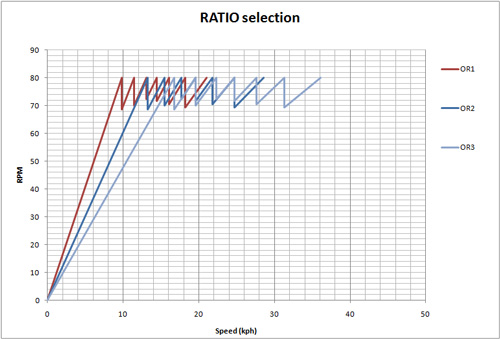
![]() The solution was an Shimano Alfine 11 speed hubgear with a 39/20 gearset. Here overlayed with my old ratio set.
The solution was an Shimano Alfine 11 speed hubgear with a 39/20 gearset. Here overlayed with my old ratio set.
No over lapping ratios, consistent rev drops, how simple.
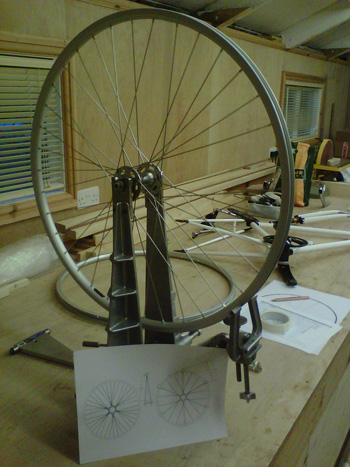 The first challenge was to build the wheels. Here I got lucky and a colleague
lent me a wheel truing jig. A lovely piece of kit.
The first challenge was to build the wheels. Here I got lucky and a colleague
lent me a wheel truing jig. A lovely piece of kit.
I have chosen to spoke the front wheel in a semi radial pattern as there is
no tractive requirement (rim brake) and it maximises lateral stiffness, although not to
the level of a radial spoke pattern it's quite close and looks great.
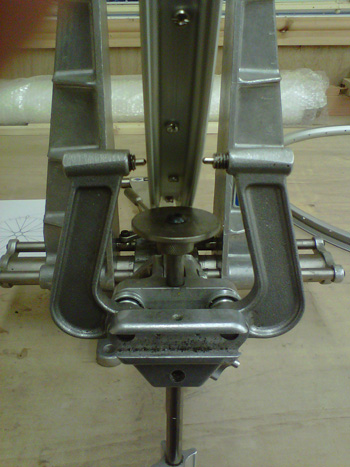 Here's the important stuff for checking the lateral and radial run out.
With careful tuning of the spoke tension you can get the wheel trued to within a few thou' laterally.
Radial truing is harder and more time consuming as you have to adjust more spokes.
Here's the important stuff for checking the lateral and radial run out.
With careful tuning of the spoke tension you can get the wheel trued to within a few thou' laterally.
Radial truing is harder and more time consuming as you have to adjust more spokes.
 Here's the rear wheel laced in a conventional 3 cross pattern.
If you fancy having a go check out
Sheldon Brown's article on
building wheels.
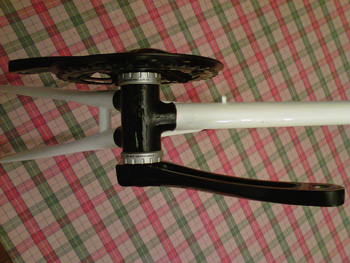 Meanwhile, the local bike shop fitted this external bottom bracket for me as I needed the frame facing.
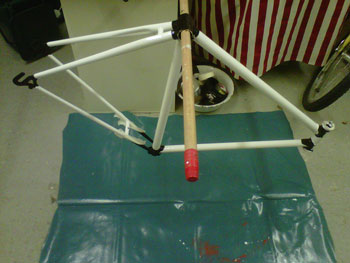
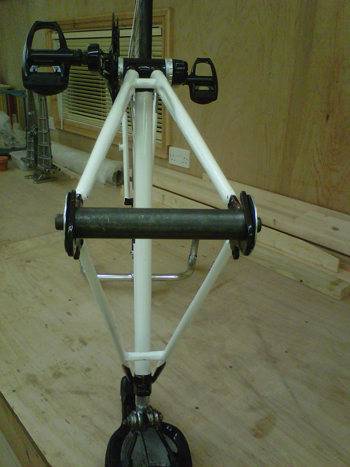 I had to have a simple jig made to set the dropouts on the chain-stays.
It's a simple piece. You bolt one side up and gently persuade the other side to line up.
Then you reverse the process and keep going until the dropouts are both parallel.
Note the large penny washers to spread the load over the whole of the dropout.
I left the fixture bolted in place for a couple of days before fitting the rear wheel / hub gear assembly.
It slotted straight in and lined up perfectly.
I had to have a simple jig made to set the dropouts on the chain-stays.
It's a simple piece. You bolt one side up and gently persuade the other side to line up.
Then you reverse the process and keep going until the dropouts are both parallel.
Note the large penny washers to spread the load over the whole of the dropout.
I left the fixture bolted in place for a couple of days before fitting the rear wheel / hub gear assembly.
It slotted straight in and lined up perfectly.
The reason for this modification is that the std derailleur drop out width is 130mm and the hub gear requires 135mm.
Most annoying...
I've chosen to run the shift cable up the rear leg of the frame, as
it gives a direct cable run to the shifter. This layout also worked with the supplied anti-rotation
washers which is a bonus.
 Putting it all together...
The only drawback with this system is that the shift mechanism is designed for 22mm diameter
handlebars and dropped handlebars are 15/16". Oh dear...
So I've had to mount the shifter on the stem which is 19mm. Awkward to use but until the
integrated brake / shifter arrives it'll have to do.
Doesn't it look so clean and simple without all that derailleur stuff.
The Alfine 11 speed hub was acquired from Farnham Cycles
and all other parts from SJS Cycles,
both companies have been very helpful with advice and prompt delivery.
For technical details check out Shimano Alfine.
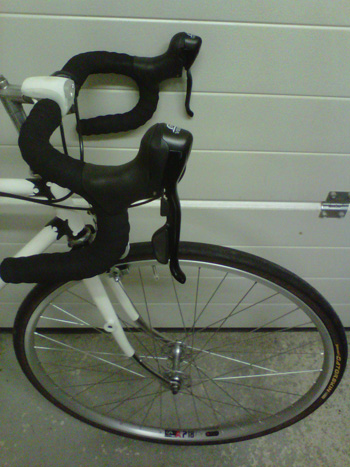 Here I've upgraded to the integrated shifter/brake lever from
Planet X
as the stem mounted Shimano shifter was unworkable.
The only downside is there is no gear indicator. But I figure that this is a
small price to pay for such an elegant solution.
Here I've upgraded to the integrated shifter/brake lever from
Planet X
as the stem mounted Shimano shifter was unworkable.
The only downside is there is no gear indicator. But I figure that this is a
small price to pay for such an elegant solution.
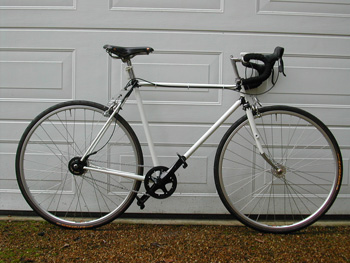 Here's the finished bike, which has now completed just over 35 miles. My local training route
is 12 mile and takes me just under an hour to complete. So plenty of room for improvement there.
The big break though is the clothing. Shorts with padding. Acquired from
Wiggle under their
DHB brand.
Here's the finished bike, which has now completed just over 35 miles. My local training route
is 12 mile and takes me just under an hour to complete. So plenty of room for improvement there.
The big break though is the clothing. Shorts with padding. Acquired from
Wiggle under their
DHB brand.
May 2012 started with the IoW Randonnee, all 105km of it.
As the certificate below shows; I made it round.
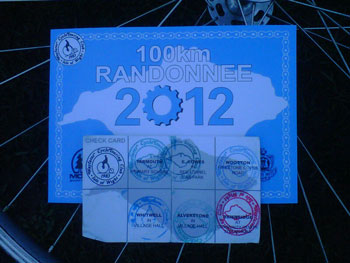
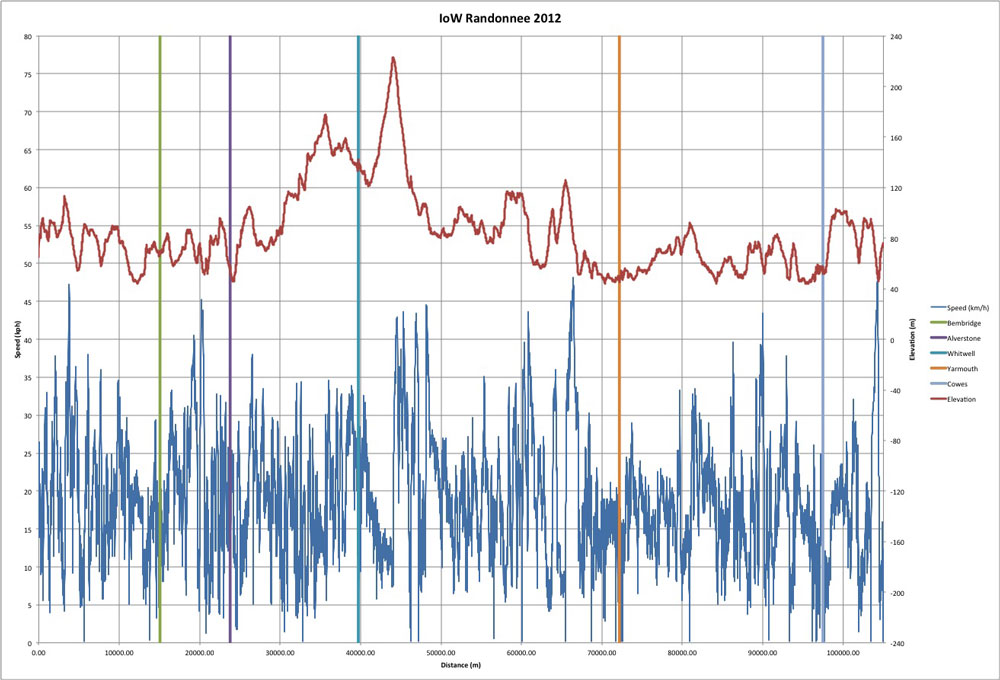 The 100km (it's actually 105km including the off course elements...) is a lot tougher than the 55km I did last year. Good job I had an extra 4 lower gears this year!
although at times even that was not enough.
The 100km (it's actually 105km including the off course elements...) is a lot tougher than the 55km I did last year. Good job I had an extra 4 lower gears this year!
although at times even that was not enough.
This graph shows the elevation and my modest speed profile. All acquired using GPSLogger II for BlackBerry.
The vertical bars are the checkpoints.
There are some scary steep climbs and every time you whistle down a hill you know there is a painful climb to follow.
I'm told the anticlockwise direction (2013) is harder. I'll definitely be fitting a larger rear sprocket for that one